For the DIY Amateur Radio enthusiast, few things in life are as satisfying as designing, building and testing your own homemade radio antenna. A 2 meter J pole antenna, constructed of 1/2″ copper tubing, is easy and cheap to make and almost guarantees practical success. With simple modifications, and careful SWR measurements, I was able to improve my j pole antenna swr performance.

Many online web sites provide help on designing a 2 meter J-pole antenna and almost all designs are very close in configuration and dimensions (see References) which yield confidence for success. The 10 foot copper length of 1/2″ tubing and plumbing fittings cost $25 at the Home Depot store. The SO-239 connector was obtained from a local Surplus Electronics store for $3.50. For cutting the Cu tubing lengths, I marked a wooden “Story Stick” for possible reproductions. Using propane torch, solder flux and solder, the antenna with connector was assembled.
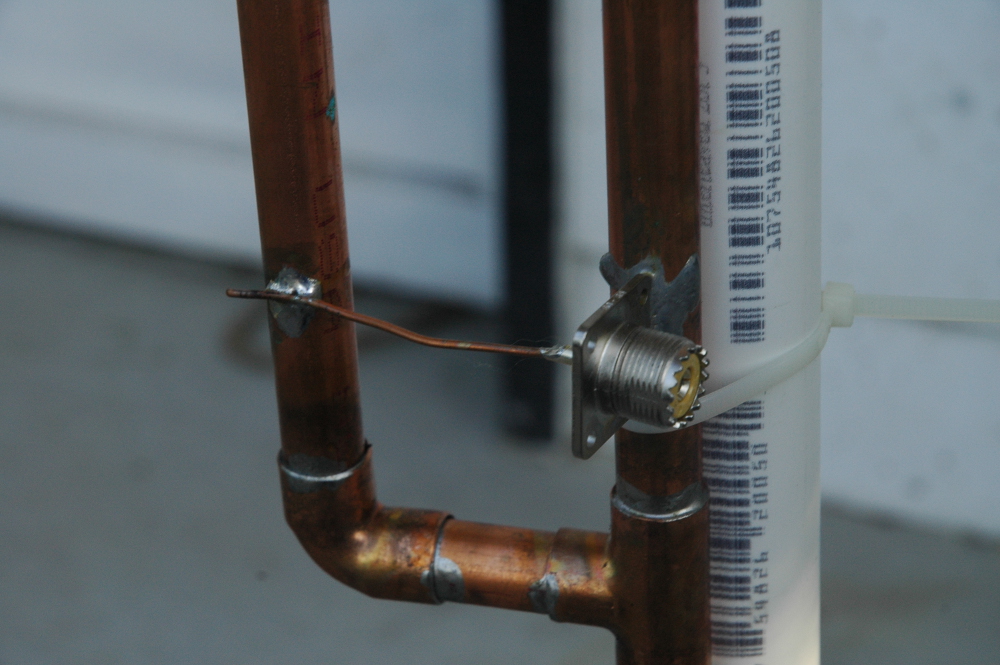
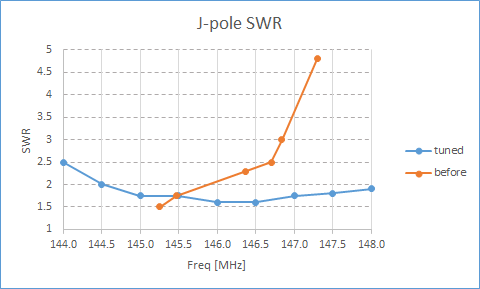
My new antenna seemed to work fine. But, in spite of my best accurate construction techniques, when I tested the assembled antenna, the SWR was too high (>3) at the 148 MHz end of the 2m band. So I decided to modify the main pole and j-pole tips with adjustable screws. Turning the screws tunes the effective electrical length.
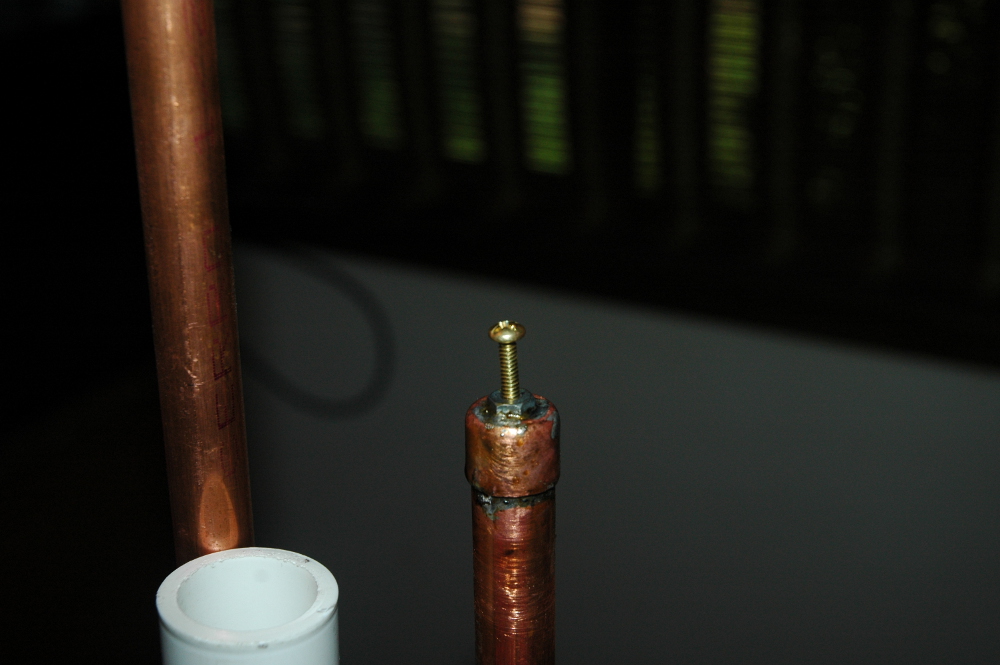
To my delight I found that adjusting the screws would control the SWR, at least within a small range, I turned the screws to tune for the lowest SWR in the middle of the 2m band range (146 MHz). My modified antenna works very well Tx and Rx. The improved SWR profile (shown below) is attributed to screw modification and careful SWR tuning. I was satisfied with the screw modifications.
References:
Hamuniverse
Ceca